Wednesday, February 17, 2010

Blocks 11 and 12 Mayberry Square and Junior Rockettes

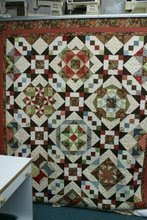
Here are the final blocks for this quilt. I'm sorry I wasn't there to see all of you but I could not get down my road. I hope all of you enjoyed the snow and got alot done. I got a little bit of sewing done and alot of housework...Ugh, the ugly word, right? Anyway, Bea took some good pictures and sent them to me and wanted them posted. Here they are:


Block 11-Mayberry Square:

Front of block


Back of block:


Helen explaining the block:

On “Helen demos” she is pointing to the center of the square piece where we are supposed to start stitching the flying geese.
We stitch the first ‘flying goose’ to the ½ of the square piece (call it the top) then the next goose goes down the left side; the next one goes across the bottom; the next down the right side. Then we finish stitching the unstitched last half of the first one..


Block 12: Junior Rockettes
Front of Block:


Back of Block:


Bea sent a few tips from Helen:

The back of center is how she did the center of the block where 8 points join. She (Helen) said that instead of sewing the first half to the second half like the instructions said, to sew to ¼ inch away from all the intersections. Join 2, then 4. Then, when it comes to putting the 2 pieces that have 4 parts, sew from the outside to ¼ inch from the center on both sides… then ‘spread’ the points to get a flat center.


Close-up of middle of block:


The group:


Okay, girls, get busy and finish those blocks and put this lovely quilt together! I have had so much fun with all of you and hope to see all of you at Thomas's again. Keep on stitching!

Saturday, January 9, 2010

Block 10 - Hearts Among the Stars

Ok ladies, here's block 10...only 2 more to go. Are you working on your sashing? Joyce Curtis and I talked about the sashing today and she says she finds it easier to do enough sashing to attach to each block. Linda Bell says she did the sashing all at once and found that to be okay too. Whichever way you find easier, it's up to you. The important thing is to get the quilt finished, right?
This has been a fun year working on this quilt and Helen and Mrs. Thomas have alot of ideas to keep going for next year...here's the block, see you next month.

Front of the block:
You need to fussy cut the middle block. Do you remember Helen's tips about the plaid fabric? To make the plaid look good, you need to fussy cut it too. Lay your triangle down and cut, flip the triangle around and directly across to match it perfectly...


Parts of the block:


Back view or pressing view of block:

Saturday, December 19, 2009

Block 9 - Crossed Towers

Hello all, sorry for the delay in getting these pics posted. It's been a very busy holiday week.

ALERT:
I hope everyone picked up corrected instructions for cutting the borders. New instructions were passed out at the store last Saturday. The corrections were on page 5. If you did not get your corrected copy, please contact the store or drop by and they will give you a copy...

This month is our 9th month and the block is called Crossed Towers. I have no quick tips for you this month. You've done all of this before so I will just post the pics and if you can think of anything we can do quicker, please tell me.


Parts of the block:


Back view of the block:


Here's wishing all of you a safe and healthy holiday season and hoping each of you have the merriest Christmas ever. I will see you next year! Ho, Ho, Ho and Happy New Year!

Thursday, November 26, 2009

Cutting the borders

Alert-Alert-Alert
Bea has an update for us...she says there is a problem with the instructions on cutting the borders. Here's what she has to say:


I’ve just cut out my ‘pieced border’ (page 5 of the “Completing the Quilt” instructions) and there is an error in it.

Step 1 says, cut 14 pieces 2” x 16 ½” on the lengthwise grain. – so that’s what I did. – and I also cut 8 number 11 triangles.

Then,
Step 2 says, fold the 16 ½” strips in half (2 ½” x 8 ¼”) and Place template #11 on the cut ends and trim off the ends. (this is a discrepancy from step 1).

The problem is –we’re supposed to cut the 14 strips to 2 ½” x 16 ½” since we have to put the 18 birds in between, and they are 2 ½” tall.

Since I cut the triangle at the end of step 1, I don’t even have enough fabric to get any 16 ½” x 2 ½” strips. – so I’ll have to go get more fabric.

Please alert the class to be sure to cut the strips 2 ½” wide – hopefully you can catch them before they do what I did.

Bea

Saturday, November 14, 2009

Block 8 - Folsom's Favorite

Ok, here's block 8. Be sure to fussy cut your middle square.


See the corner triangles? The green gingham looking fabric...You can do two small triangles to make these or one larger triangle. Directions say to cut and piece 8 number 14B triangles. If you want to substitute and skip this step you can cut 4 - 13B triangles and forget the piecing...It saves you a step....


(Remember: to see the block close up, just click on the picture)
Parts of the block:


Back of the block showing how to press:


Here's some pics of the sashing. I haven't started working on this part yet. I will post some hints later when I look at it further...


Saturday, October 10, 2009

Block 7 - Center Stage

Here we are in the seventh month of our quilt. These blocks haven't been too hard, now have they? I have enjoyed every one of these blocks. The Marti Michell templates really make these blocks go together so easily...here's this month's pictures. I hope you are enjoying making these as much as I am....

Center Stage
Front of Block
Don't forget to try to fussy cut those leaves around the middle block! Didn't Helen's look so nice?


Parts of the block - nothing new here...we can do this!


Back of the block (how to press those seams)


Now, for the extra's:

Here's pictures of upcoming items for next month. The little pincushion was so cute! The Dresden Plate block was a winner too! If you don't know how to use the Yoyo gadget, get someone to show you. This tool makes great yoyos and your stitches are all even...


Here's some pictures of the group...


Guilds and small groups around the Mesquite area

Garland Quilt Guild meets
the first Tuesday of each month at:
7:00 p.m.
First Presbyterian Church
930 West Avenue B
Garland, TX 75040
corner of 9th and Avenue B


Mesquite Quilt Guild meets the third Tuesday of each month. There is a daytime meeting during the day from 1:00-3:00 and the night time group meets that same day from 6:45 - 8:45...This group meets at the Rutherford Recreation Center

(972) 216-7790
900 Rutherford Dr
Mesquite, TX
This is the same place that the Mesquite Quilt show takes place.

Sew What's Quilt Group
Our small group is a friendship group(we are part of the Dallas Quilt Guild). This group meets the third Thursday of each month.

We meet at the
New Covenant Methodist Church
3032 Beltline Rd
Sunnyvale, Tx. 75182

We are on Beltline Rd between Town East Rd and Tripp Road. We are across the street from the Ponderosa Day Care. The church in the middle of 3 churches. Sunnyvale Baptist on one side and I don't remember the other church's name.... Please come visit us...

My Other Blog

My Other Blog
Living4Quilting