Wednesday, February 17, 2010

Blocks 11 and 12 Mayberry Square and Junior Rockettes

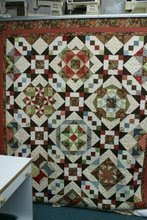
Here are the final blocks for this quilt. I'm sorry I wasn't there to see all of you but I could not get down my road. I hope all of you enjoyed the snow and got alot done. I got a little bit of sewing done and alot of housework...Ugh, the ugly word, right? Anyway, Bea took some good pictures and sent them to me and wanted them posted. Here they are:


Block 11-Mayberry Square:

Front of block


Back of block:


Helen explaining the block:

On “Helen demos” she is pointing to the center of the square piece where we are supposed to start stitching the flying geese.
We stitch the first ‘flying goose’ to the ½ of the square piece (call it the top) then the next goose goes down the left side; the next one goes across the bottom; the next down the right side. Then we finish stitching the unstitched last half of the first one..


Block 12: Junior Rockettes
Front of Block:


Back of Block:


Bea sent a few tips from Helen:

The back of center is how she did the center of the block where 8 points join. She (Helen) said that instead of sewing the first half to the second half like the instructions said, to sew to ¼ inch away from all the intersections. Join 2, then 4. Then, when it comes to putting the 2 pieces that have 4 parts, sew from the outside to ¼ inch from the center on both sides… then ‘spread’ the points to get a flat center.


Close-up of middle of block:


The group:


Okay, girls, get busy and finish those blocks and put this lovely quilt together! I have had so much fun with all of you and hope to see all of you at Thomas's again. Keep on stitching!

Saturday, January 9, 2010

Block 10 - Hearts Among the Stars

Ok ladies, here's block 10...only 2 more to go. Are you working on your sashing? Joyce Curtis and I talked about the sashing today and she says she finds it easier to do enough sashing to attach to each block. Linda Bell says she did the sashing all at once and found that to be okay too. Whichever way you find easier, it's up to you. The important thing is to get the quilt finished, right?
This has been a fun year working on this quilt and Helen and Mrs. Thomas have alot of ideas to keep going for next year...here's the block, see you next month.

Front of the block:
You need to fussy cut the middle block. Do you remember Helen's tips about the plaid fabric? To make the plaid look good, you need to fussy cut it too. Lay your triangle down and cut, flip the triangle around and directly across to match it perfectly...


Parts of the block:


Back view or pressing view of block:

My Other Blog

My Other Blog
Living4Quilting